Hello again, friends! I’m here to talk about my favorite medium- Makeup! Today I’m going to go over my daily makeup routine. It may seem daunting, at first, to expand your morning routine but once you’ve got it down it can be accomplished in a short amount of time!
First things first, the most important step to flawless makeup is balanced skin. I have a pretty extensive skincare routine, but the most important part is to cleanse, exfoliate and moisturize. This is important because having fresh, clean skin will set you up for success in your makeup look!
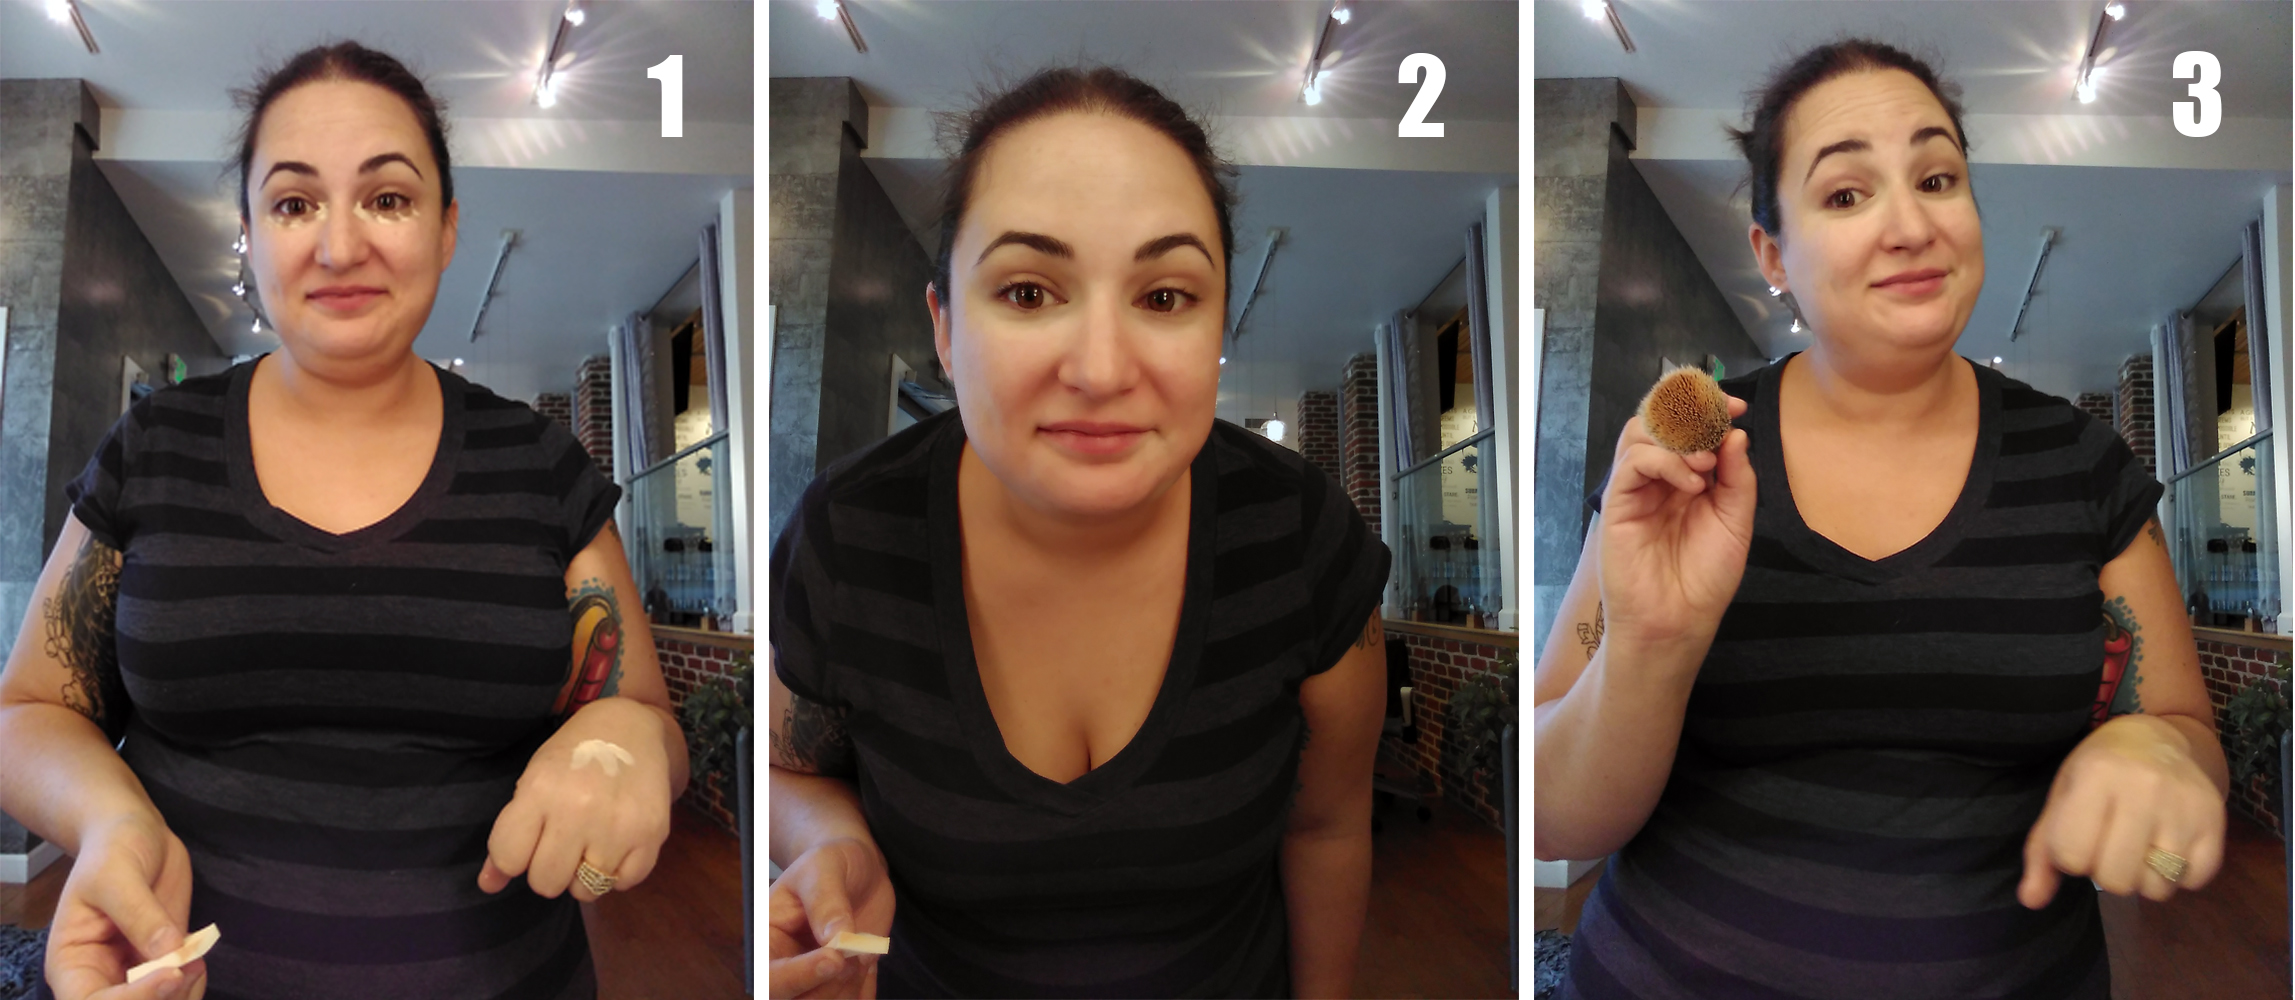
#1 The first thing I do is put concealer under my eyes. I do this because I naturally have very dark circles under my eyes and I already know I’ll need concealer. Here’s my theory about concealer- it’s easy to get carried away and apply too much if you’re putting it on under your foundation. What this can do is make your foundation not lay as well as possible, or it can become thick and settle into fine lines and wrinkles. Since we don’t want that to happen I only apply concealer in places where I know, without a doubt, that I’ll need it- like under my eyes. The rest of the spots I wait for until I’ve applied my foundation, this is because we want to give the foundation (or base) the opportunity to do its work. Often, our foundation will cover our imperfections just fine. I always wait until my foundation is set to see if I need to apply concealer, and normally I do not. I used: Jo Mouselli Skin Renewing Concealer in Neutral.
I applied with my ring finger, freshly cleaned and dried, in small dots from the inside corner of my eye to about ¾ of the way out. I then blended with a soft sponge. This concealer has a super soft applicator on it, but I tend to use too much if I use the built in applicator, but definitely find what works best for you. Hint: When blending concealer we don’t want to blend it too much so use a gentle dabbing motion to blend until it doesn’t look blotchy.
#2 Secondly I apply my foundation. I used Glo Minerals Luxe Foundation in Almond. I like this formula because it’s lightweight and is very moisturizing.
I like to apply with a brush. Many people like to apply with their fingers and I prefer not to, simply because I have acneic skin and I don’t want to introduce more bacteria than necessary to my face. Another great option is a makeup sponge. The difference between using a brush and a sponge for your foundation is that a brush will deposit more product onto your skin and a sponge will deposit less – it’s literally a sponge and will soak up excess product. I use a sponge when I’m going for a no-makeup look or when I’m using a heavier liquid foundation. I apply to the T-zone first and feather out towards the outside of my face.
#3 Hint: Don’t forget to blend into your hairline so that you won’t look like you’re wearing a mask!
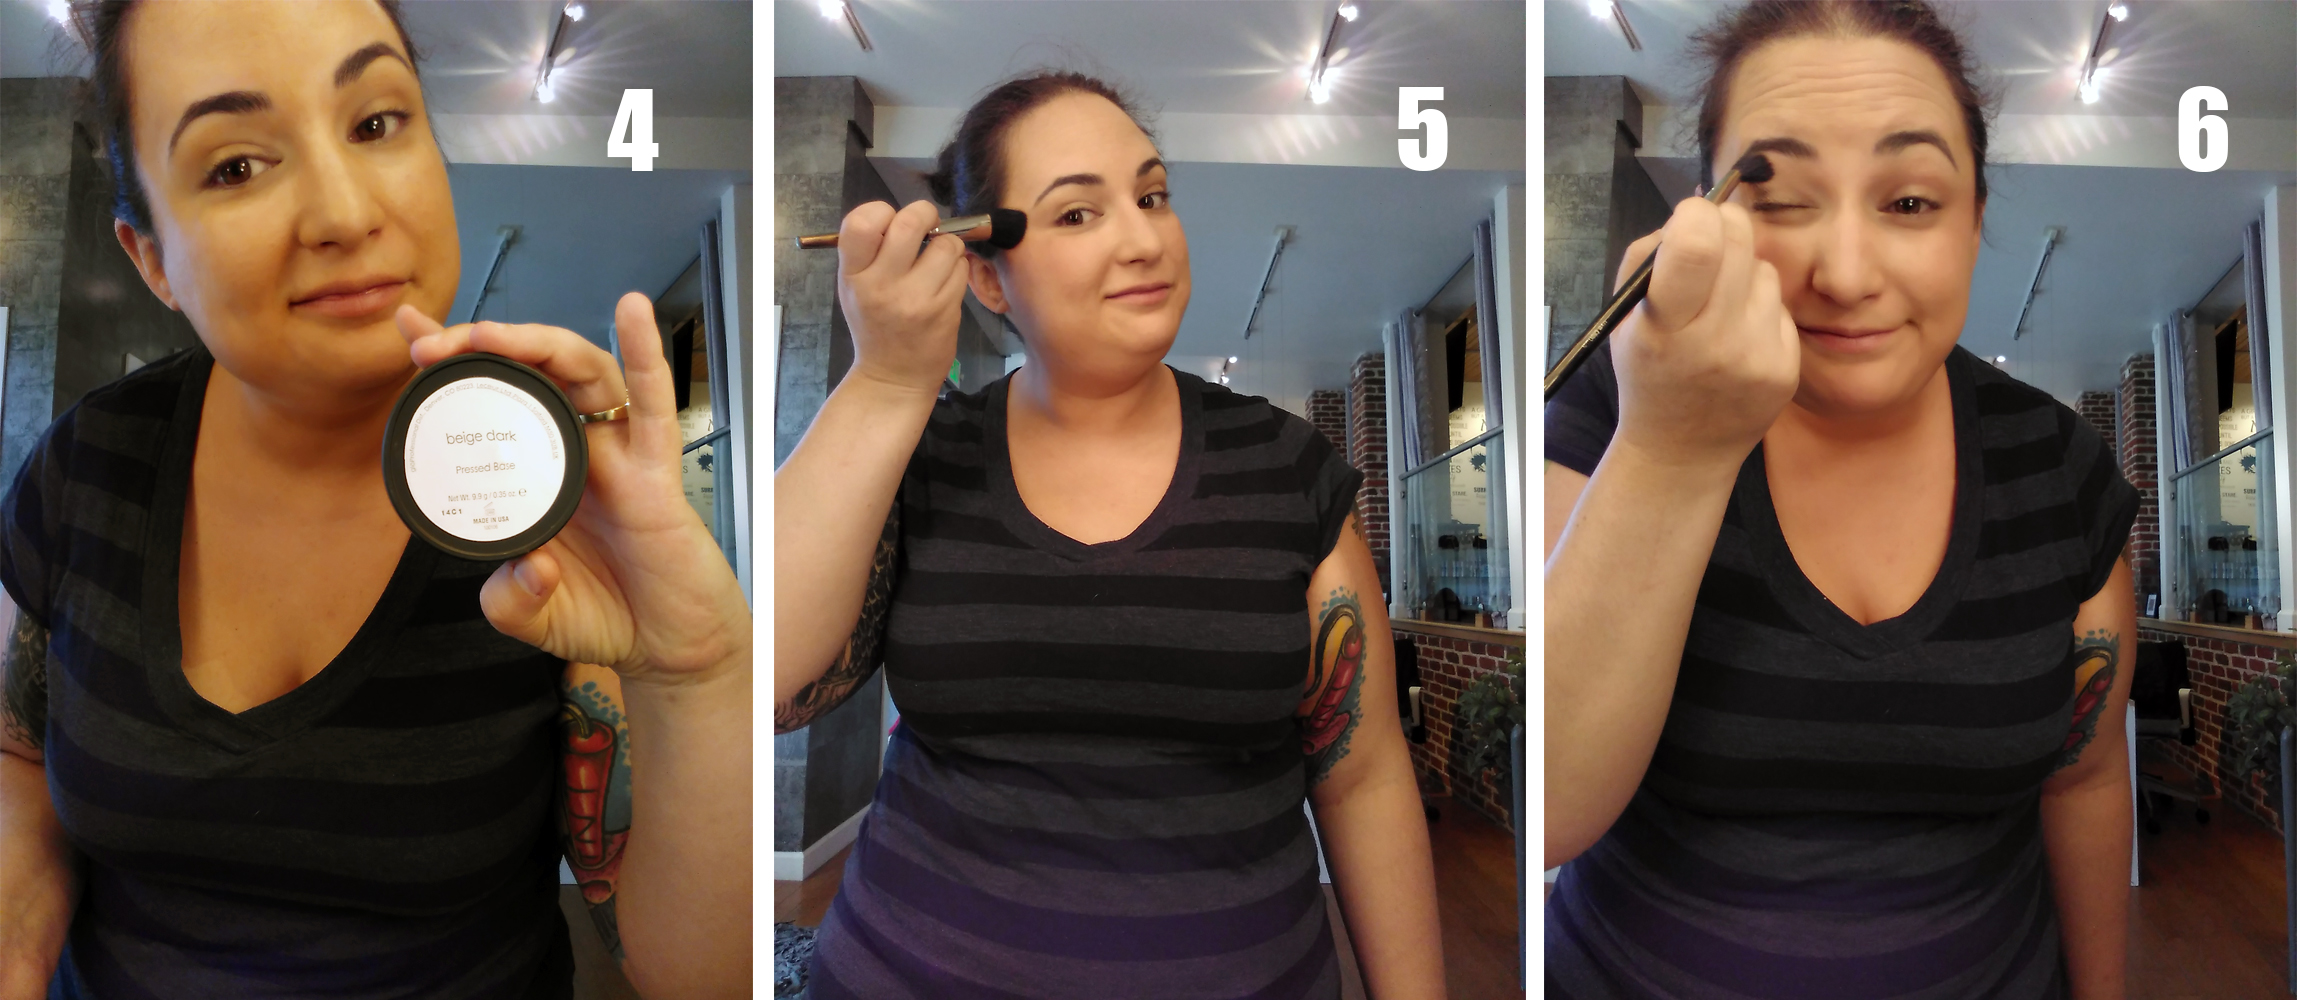
#4 Next up is powder! I use powder to set my foundation and give my color some more depth. I tend to get oily as the day goes on and setting my foundation with powder is a way to ensure that it won’t move around throughout the day. I apply with a big fluffy brush, I do this because I like an airbrush finish and blending is so much easier with a powder brush. Some people use sponges or a little poof and those are fine too, but they deposit less powder and I often feel like it takes longer. I’m generally very fair, but gardening this summer has left me with a little color! I used Glo Minerals Pressed Base in Beige Dark.
#5 Now blush! I love blush, I have a million different colors and it’s an easy, versatile way to add some color and draw focus to or away from your features. I used Glo Minerals Blush in Hibiscus – I like this color because it looks good on everyone, and it’s a nice warm color but light enough that it’s hard to apply too much. I like to use a slightly angled, smaller, blush brush, this is because I like to have a lot of control over where I am putting my blush. I have very high cheek bones and I really like to accentuate them. I start by dotting some color on the top of the apple of my cheek – I smile and find the highest point of my cheek and apply there. Then I draw it out and up to about even with the outer corner of my eye and blend into my hairline. I maneuver my brush is a figure 8 while I’m applying so I don’t just have a streak. The key here is to blend, blend, blend!!
#6 Eyes!! I tend to lean towards very neutral colors around my eyes- but sometimes I get a wild hair and go crazy! Today, however, I’m staying neutral. I usually use three colors- a base color, usually a medium toned middle brown, a crease color, generally a darker brown or a pop of color if I feel like it, and a light color for highlighting.
Today I used Glo Minerals Eye Shadow in Twig, Kona and Fawn.
I applied Twig with an eye texture brush, I like this brush because, I’m sure you can guess, it’s fluffy. I pick up as much shadow as I can and then I tap the brush on the side of the container to knock off anything that will create a fall-out on my cheeks (since I apply my face makeup first I have to remain conscious of my eye makeup and how much I’m picking up.) I basically apply my base color from my lash line to just below my brow. This will give us a nice even color to work with and blend into. Again, blend, blend, blend!
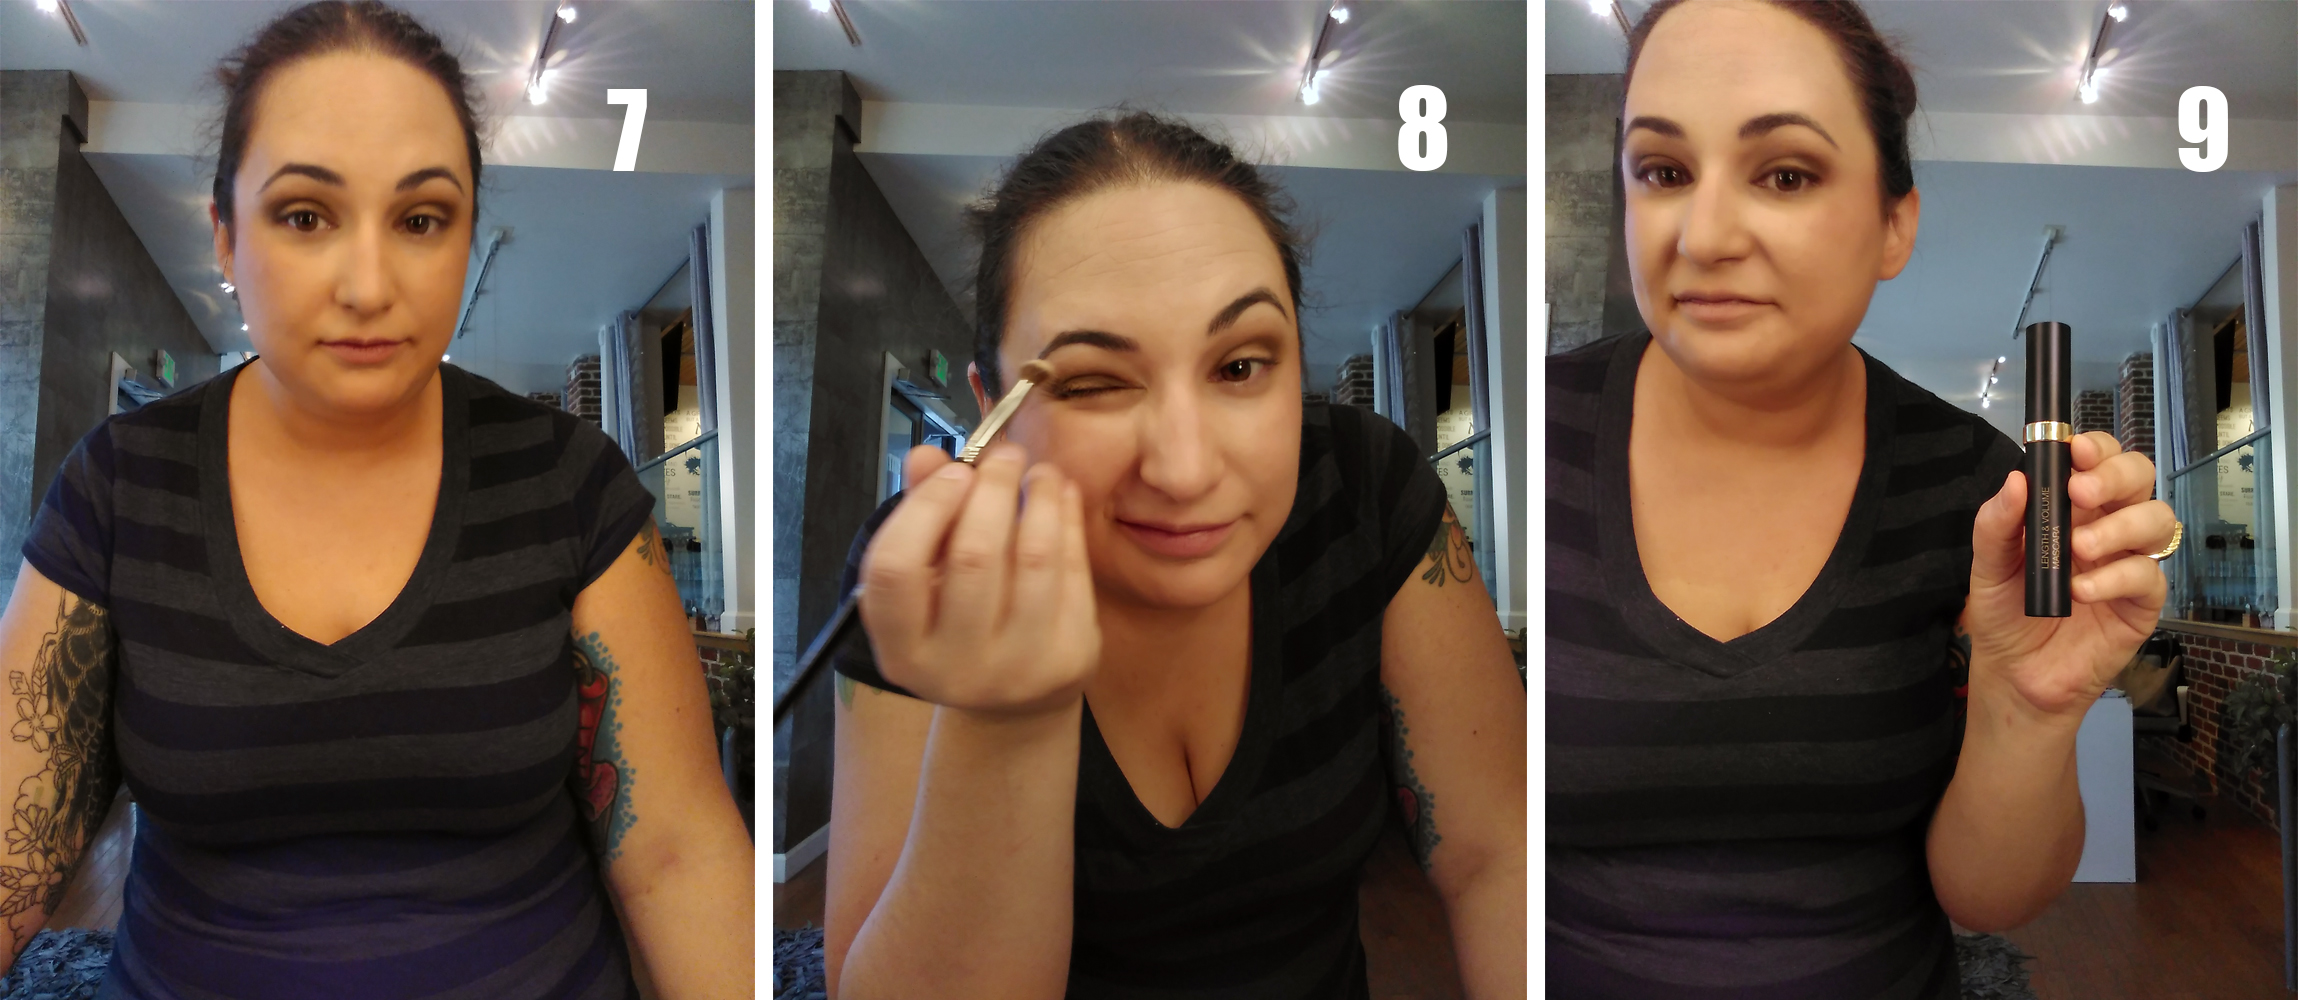
#7 I apply my darkest color next, Kona. I use a smaller, more compact brush for this. We really don’t want or need to use very much and I literally just use the smaller brush to put the color where I want and then use my previous brush to blend it. I apply it to the outside corner of my lids and dot along my crease about ⅓ of the way in – blending will distribute the color as far as you’d like.
#8 The last color I apply is the lightest, Fawn. I do this so that I can lighten the dark color if need be, but also because to keep it from getting lost among the other colors. I use another small brush, for control, and pick up a lot of color and knock off the excess on the side of the container. Then I press the color into the inside corner of my lid, the middle of my eyelid and just under my brows. I do this primarily to highlight; highlighting the inside corner will make your eyes appear brighter, the middle of the lid will make your eyes appear more open and under your brows will create an instant brow lift. Then we blend! If you think you’ve blended enough, blend some more.
#9 Next I do my eyeliner and mascara, I used the Xtreme Lashes® Glideliner Long Lasting Eye Pencil in Xpresso and the Xtreme Lashes® Length & Volume Mascara. I like to apply in a dotted line along my lash line and smudge it into a nice soft line with an angled brush. This will create a less harsh line and it’ll be less likely to migrate down my face as the day goes on and my skin starts to get oily. I like the Xtreme Lashes® Glideliner Long Lasting Eye Pencil because it goes on very smoothly and once it’s set, it’s staying where it is. The Xtreme Lashes® Length & Volume Mascara is great because it’s designed to work with our lash extensions and is an easy way to add a little more definition or drama to your look.
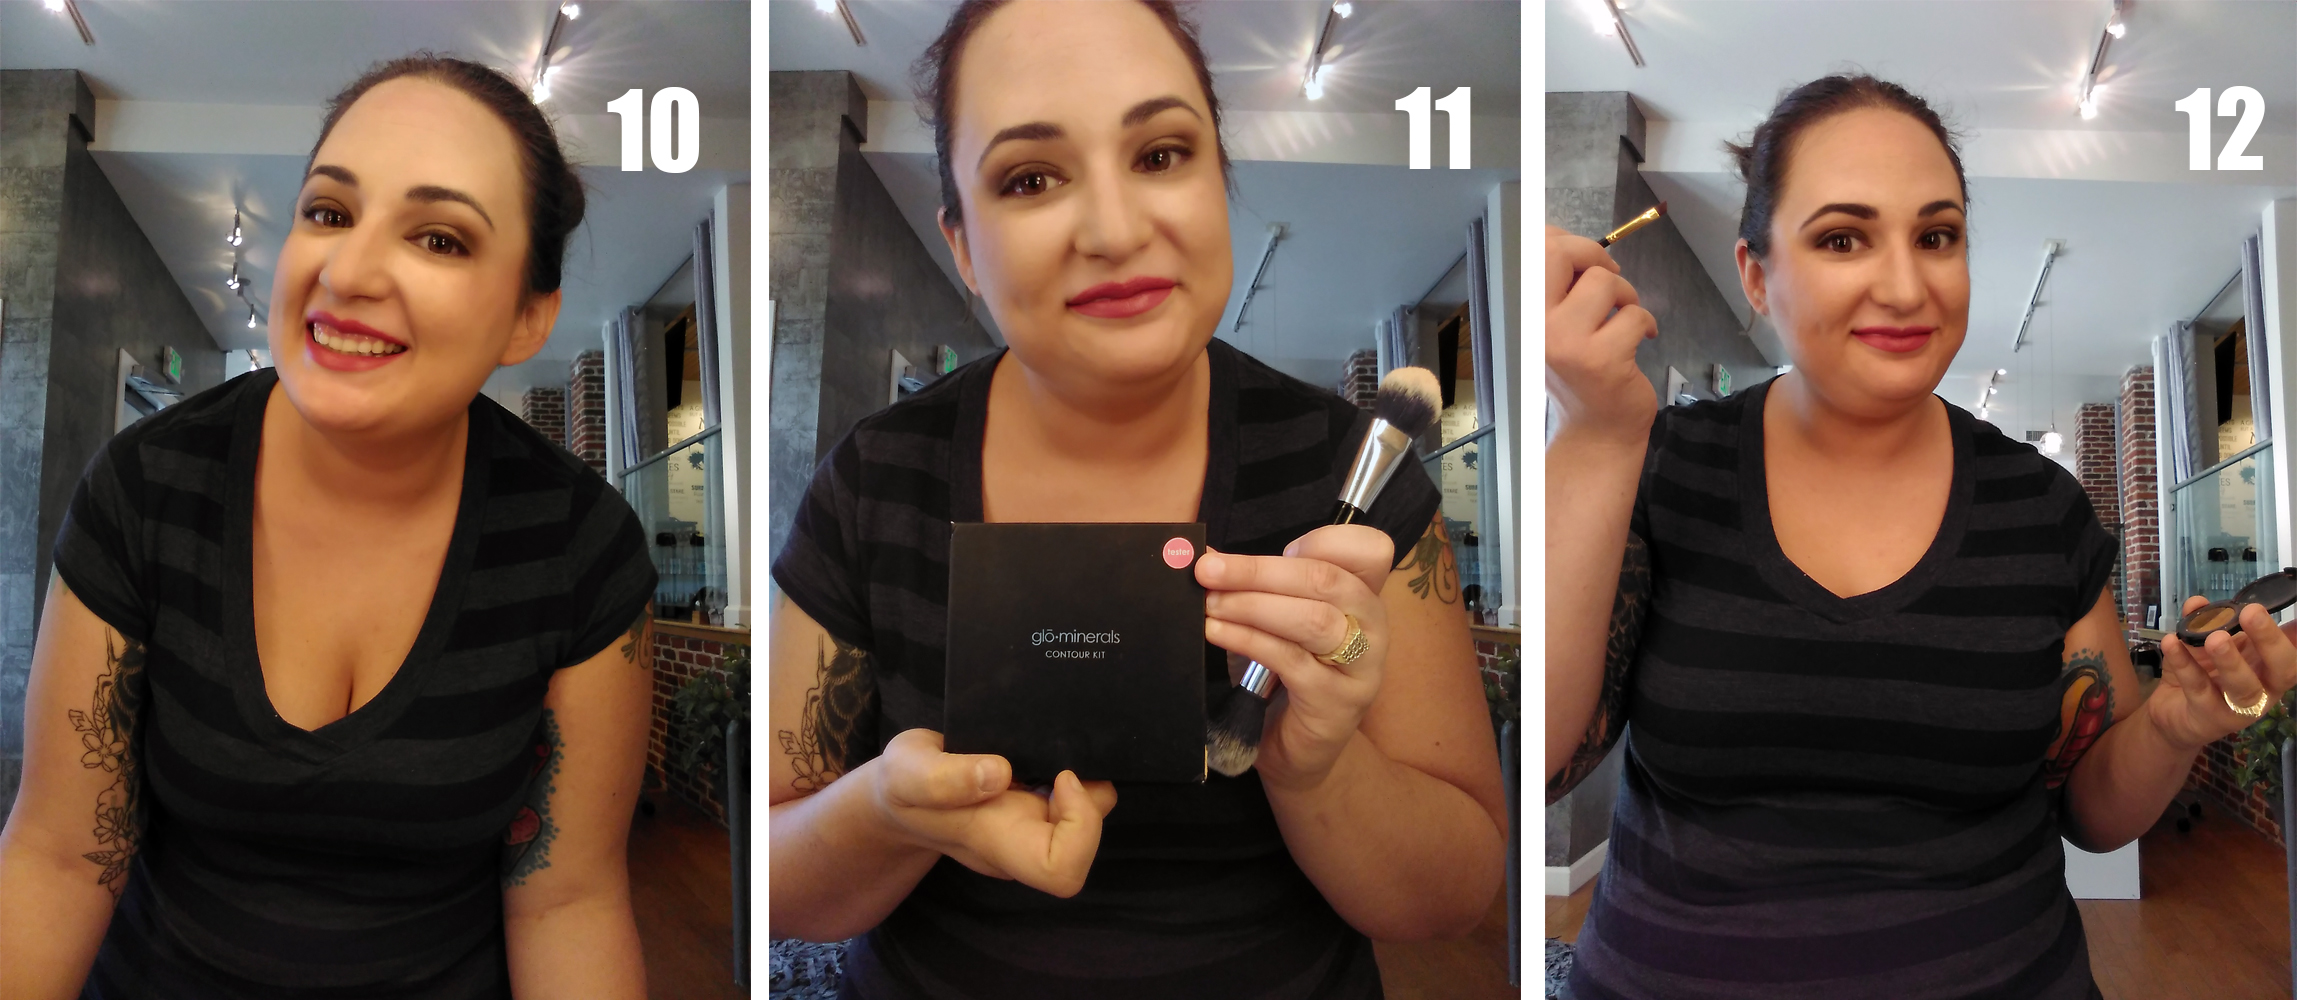
#10 I do my lips last because I make a lot of faces while I’m concentrating and sometimes my lipstick can get everywhere. I used Glo Minerals Lipstick in Cabaret. I like this color because it’s bright and cheery and it makes my lips feel great. Normally I line my lips with a lip liner because I have some fine lines (*shakes fist*) and it helps keep my lipstick from bleeding. I didn’t this time because I brought my foundation down onto my lips to fill in the lines where needed. I apply my lipstick with a brush, again for more control.
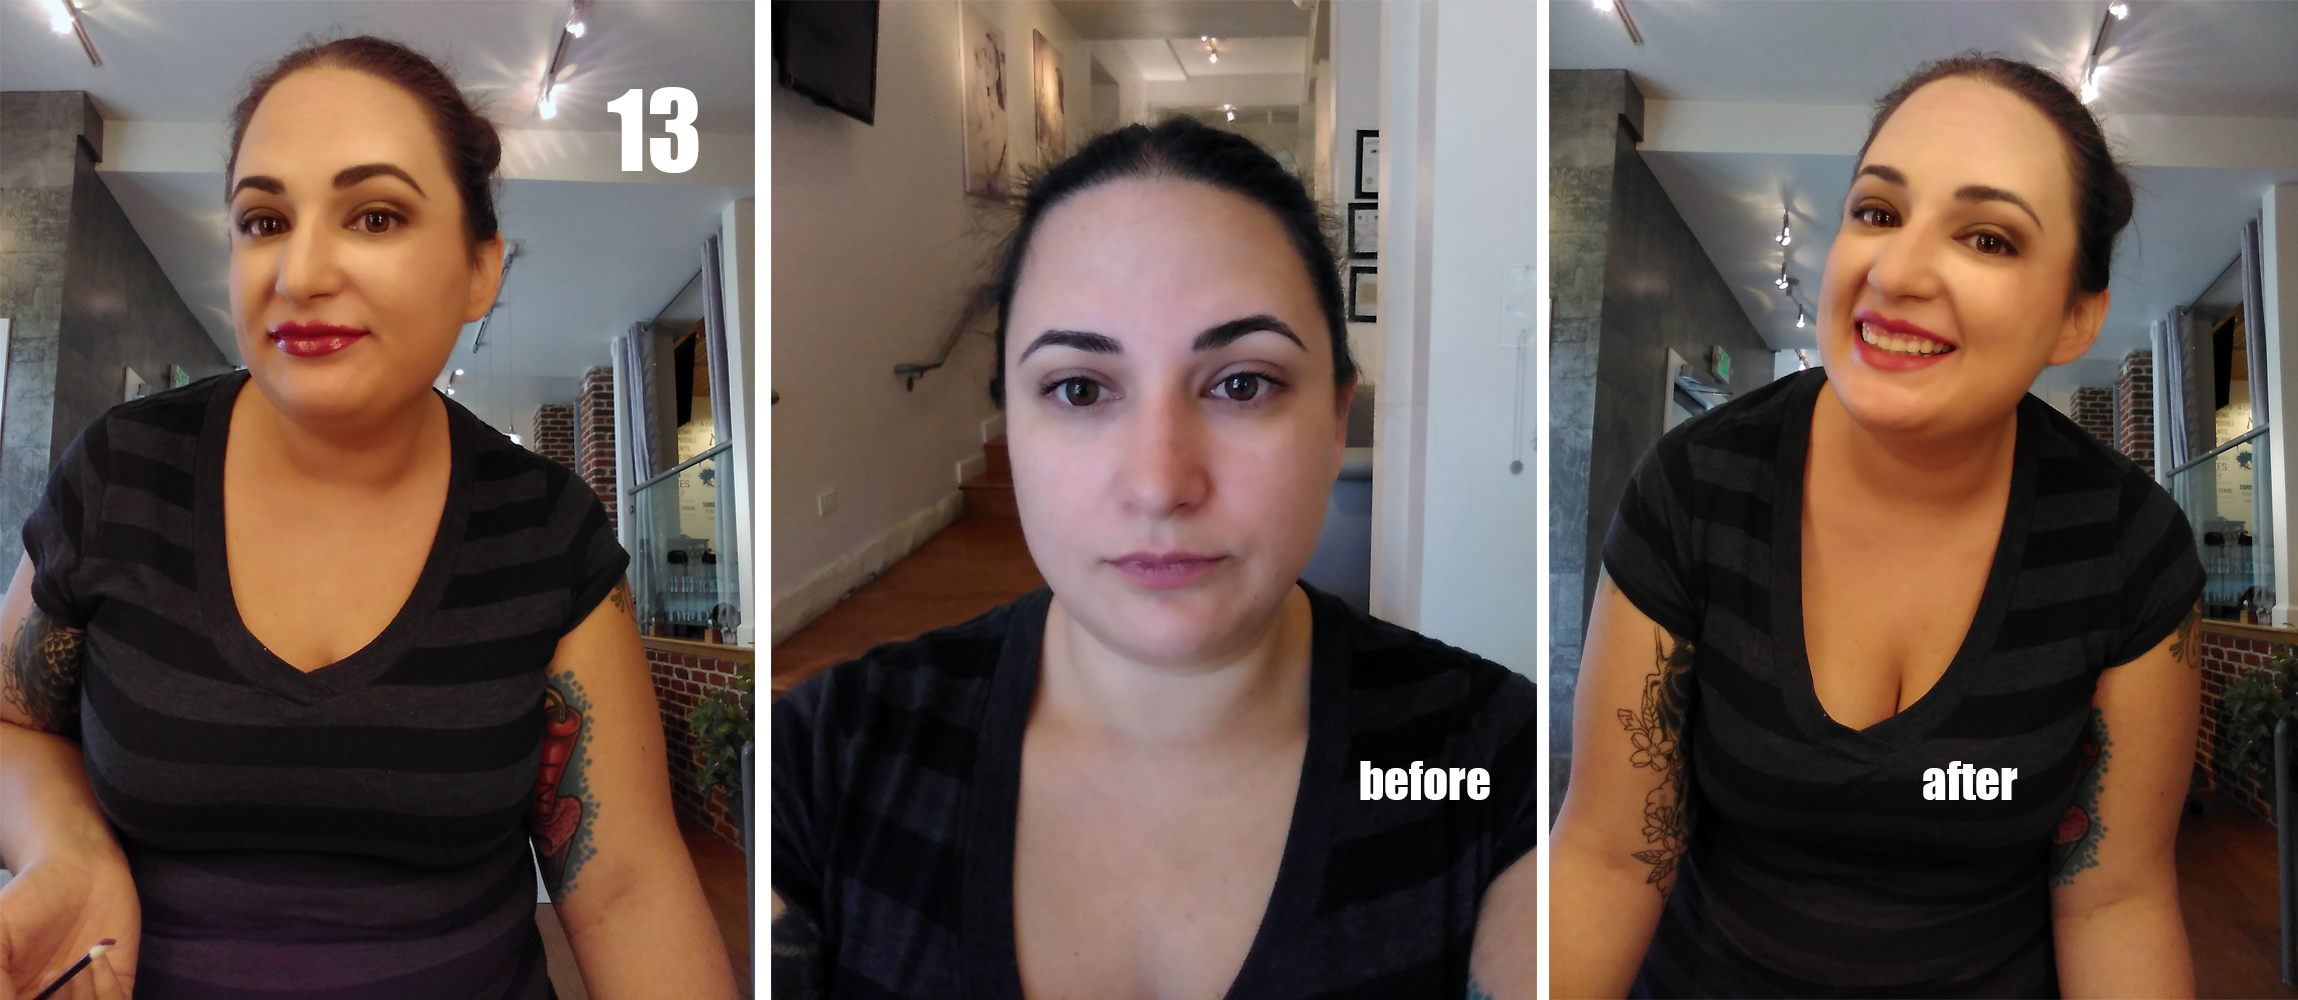
And Viola! Done! I usually go from fresh faced to work-ready in about 20 minutes.
#11 To get my day look ready for happy hour I make a few minor adjustments. First, I add a light highlight and contour. I used Glo Minerals Contour Kit in Fair to Light. To contour I took the lighter of the contour colors and applied it just under my cheek bones and drew it up into my hairline. Blend, blend, blend! For my highlight I find the places where the light naturally hits my face and I dab on my highlighter and gently blend it.
#12 Next I filled in my brows with Glo Minerals Brow Duo in Brown. I line the bottom of my brows with the darker color to create my shape and filled in with the lighter color, feathering the colors together, and brushed them with a spoolie to make sure they were blended.
#13 Lastly, I added some lipgloss. I used Glo Minerals Gloss in Black Cherry.
And there you have it! Take your work look out for happy hour with three fast, easy steps! If you would like to submit a question, for a chance to be featured on my next Ask a Makeup Artist post (and receive a discount on a future makeup application, consultation or lesson?), please email it to shannon@livelovelash.com
Written by Shannon Wells

gate.io türkiye
I am an investor of gate io, I have consulted a lot of information, I hope to upgrade my investment strategy with a new model. Your article creation ideas have given me a lot of inspiration, but I still have some doubts. I wonder if you can help me? Thanks.
Реферальная программа binance
I don’t think the title of your article matches the content lol. Just kidding, mainly because I had some doubts after reading the article. https://www.binance.com/ru-UA/register?ref=GJY4VW8W
create binance account
Thank you for your sharing. I am worried that I lack creative ideas. It is your article that makes me full of hope. Thank you. But, I have a question, can you help me? https://www.binance.com/en/register?ref=W0BCQMF1
Inscreva-se
Your point of view caught my eye and was very interesting. Thanks. I have a question for you. https://www.binance.info/pt-PT/join?ref=IJFGOAID
Phone Tracker Free
At present, remote control software is mainly used in the office field, with basic functions such as remote file transfer and document modification.
www.tribalselfgov.org
This paragraph presents clear idea for the new people of
blogging, that actually how to do running a blog.
бнанс рестраця для США
Thank you for your sharing. I am worried that I lack creative ideas. It is your article that makes me full of hope. Thank you. But, I have a question, can you help me?